Cooking & Baking
Related: About this forumNew Series: Dinner Pies! Veggie, Old Bay, Shrimp, & Chicken + 2 Crusts!!🌞

Being something of a mind reader in matters of pastry and crust, I know
what you might be thinking (if, that is, you’re not already sprinting toward the
car, shopping list in hand). You’re thinking you couldn’t make a homemade
pie pastry even if your life depended on it. You’ve tried. You’ve bungled.
You’ve failed. You’ve more or less given up. You weren’t born with the pie
dough gene. And you haven’t gotten over the dreadful memory of your dough
flying apart in midair while your boyfriend (spouse, mother, brother) laughed
like a hyena, scarring you for life. (I agree: He or she is a jerk.)
Well, I’ve heard it all before, in spades, and I can help. I know this because
when I’m not writing cookbooks, I’m the “dean” of ThePieAcademy.com,
where I teach folks just like you how to make great pies, both sweet and
savory. These folks arrive at my virtual doorstep, unload their pie pastry
baggage, and let me know, in no uncertain terms, that they are hopeless.
They are not. And neither are you.
Which is to say I’ve done my best to anticipate the questions you’re likely
to have about making pie doughs and dinner pies, and I have filled these
pages with useful advice, tips, and techniques that will help you overcome
your fear of pie making. I’ve included discussions about my favorite dinner
pie tools and equipment, the best methods for rolling your dough and getting
it into the pan, and instructions for how to prebake your pie shell when you’re
making a quiche. All this, plus my thoughts on pantry ingredients, and a guide
to shopping for produce, too.
And now, it’s up to you. You’re holding the manual, the ingredients you
need are within easy reach, and now you simply have to find something that
looks good and get busy. If you’re an old hand at dinner pies, I think you’ll
discover plenty of new ideas to get you excited about your craft. If you’re a
relative newcomer, I hope you’ll embrace your dinner pie “beginner’s
mind”—that Zen quality of openness, eagerness, and curiosity that comes
with new exploration. Proceed with confidence and savor the outcome of your
efforts with those you love. And if you do happen to run into any obstacles,
just send me an email (ken@thepieacademy.com), and I’ll do my best to help
you find a solution.

Vegetable Pot Pie with a Pumpkin Biscuit Crust
One of my first professional cooking jobs was head cook and bottle washer at
a group home for kids, where everyone—and every meal—was vegetarian. It
was an ongoing challenge finding dishes that pleased all the kids and staff,
but whenever I would make versions of this meatless pot pie I knew there
would be only compliments. It’s that delicious.
MAKES 6 SERVINGS
1 recipe **Pumpkin-Sage Biscuit Crust, prepared as instructed in step 1
FILLING
4 tablespoons (½ stick) unsalted butter, plus 2 tablespoons additional melted butter for the
biscuits
2 leeks (white and pale green parts only), chopped (see [>])
2 celery ribs, thinly sliced1 smallish green or red bell pepper, seeded and chopped
8 ounces white mushroom caps, sliced
1 carrot, peeled and cut into thin rounds
3 cups vegetable broth
2 cups peeled and cubed winter squash
1½ cup frozen green peas (no need to thaw)
1 medium potato, peeled and cut into large dice
1½ tablespoons tomato paste
¾ teaspoon dried thyme
½ teaspoon dried sage
1 bay leaf
¼ cup all-purpose flour
½ cup light cream or half-and-half
½ cup grated Parmesan cheese
1. Prepare the biscuits as instructed, but don’t add the liquid to the dry
ingredients quite yet. Refrigerate both the dry and liquid ingredients.
2. Melt the 4 tablespoons butter in a large stovetop casserole over medium
heat. Stir in the leeks, celery, bell pepper, mushrooms, and carrot. Salt
lightly, then cover and cook for 3 to 4 minutes, allowing liquid to build
in the pan. Uncover the pan and cook the vegetables, stirring often, until
everything is soft and the leeks are starting to turn golden, another 8
minutes or so.
3. Add the vegetable broth, winter squash, peas, and potato to the casserole.
Bring to a simmer, stirring in the tomato paste, thyme, sage, and bay leaf,
plus ¼ teaspoon salt—or more if your broth is not salty—and ground
black pepper to taste. Reduce the heat, cover, and simmer the mixture
gently, stirring occasionally, until the winter squash is very soft and
starting to fall apart, anywhere from 10 to 20 minutes. The potatoes
should be tender. Preheat the oven to 400°F.
4. Transfer two or three ladles full of broth to a small bowl. Add the flour
and whisk until smooth. Stir this thickener back into the pot and continue
to simmer, stirring often, for about 5 minutes. Stir in the cream and cook
at a very low simmer for 5 minutes more. Remove from the heat. Taste
and see if you need more salt and pepper.
5. Transfer the filling to a deepish, medium-size casserole; the filling
should not come any closer than 1 inch to the top rim.
6. Finish mixing the biscuits, patting them out so they’re slightly more than
½ inch thick. Using a 2- or 2¼-inch round cutter, cut the dough and
gently place the rounds, evenly spaced, on top of the filling. Brush the
tops with the remaining 2 tablespoons melted butter, then sprinkle the
Parmesan cheese over them.
7. Bake on the center oven rack until the biscuits are crusty and golden,
about 25 minutes. Transfer to a rack and cool for at least 10 minutes
before serving.
RECIPE FOR SUCCESS
I often like to break up the preparation when I’m making an ambitious
dish; here’s how I do it for this one. I prepare the filling the day before
and transfer it to the casserole dish I’m going to bake and serve it in.
Then I cover it and refrigerate overnight. The next day, I put the cold
casserole in a 375°F oven about 30 minutes before I make the biscuits,
stirring it once or twice. Once it comes to a bubble, I increase the heat to
400°F, add the biscuits, and finish baking.
****
**Pumpkin-Sage Biscuit Crust
When you’re in the mood for something other than a flaky top crust, these
biscuits make a gorgeous variation for almost any saucy pot pie. They’re the
crowning glory for one of my favorites, the Vegetable Pot Pie on [>].
MAKES ENOUGH TO COVER 1 LARGE DINNER PIE
2 cups all-purpose flour
1 tablespoon sugar
2 teaspoons baking powder
1 teaspoon crumbled dried sage
¾ teaspoon salt
½ teaspoon baking soda
Pinch of ground cloves
6 tablespoons (¾ stick) cold unsalted butter, cut into ½-inch cubes
½ cup cold buttermilk
½ cup canned pumpkin puree (not pumpkin pie filling)
¼ cup cold whole milk
1. Combine the flour, sugar, baking powder, sage, salt, baking soda, and
cloves in a large mixing bowl. Add the butter and toss to coat with the
flour. Using a pastry blender, cut the butter into the dry mixture until it is
well combined, with pieces of butter the size of peas.
2. In another bowl, whisk together the buttermilk, pumpkin, and milk.
Make a well in the dry ingredients and add the liquid. Stir briskly with a
wooden spoon until the dough pulls together. Flour the dough, your
hands, and your work surface. Turn the dough out onto the work surface,
knead it gently two or three times, then cut and proceed as directed in the
dinner pie recipe. (Typically, the dough is patted a little thicker than ½
inch, then cut into rounds with a 2- or 2¼-inch biscuit cutter before being
placed on the filling. It can also be patted out and then cut into squares.)
RECIPE FOR SUCCESS
If you’re wondering why there is sugar in a biscuit topping for a savory
pie, don’t be alarmed. The biscuits don’t actually have a sweet flavor;
there’s not enough sugar for that. But there is enough to counter the
bitterness of the leavening and add a bit more punch to the pumpkin.
When I say “knead” here—where you turn the dough out of the bowl—
this is nothing like kneading a yeasted bread dough; that would be a
sticky mess. Rather, use a very light hand, with light pressure, and treat
the dough gingerly, keeping your surfaces floured. Do that, and you
shouldn’t have any sticking issues.
****
COLLECT THOSE CUTTERS
In a number of recipes in this collection, you’re instructed to use a
round cutter of a certain size. Do you keep cutters on hand? You should.
It’s such a basic kitchen tool, and I can’t tell you how many times I
reach for my cutters in a given week. I use them for biscuits, for tartlets,
to make a small hole in the center of a large top crust—the list goes on.
I even have specialized cutters for when I want a chicken silhouette to
top a chicken pot pie, or a pig when there’s sausage in the filling. Still
others I use when I want to put an autumn leaf in the center of a fall
fruit pie. So collect those cutters. You can pick up a graduated round set
for just a few dollars and, if you do much baking at all, you’ll
eventually use all of them. That’s what I call a good investment
*************************************************************************

Old Bay Seafood Pot Pie
A really good seafood pot pie is one of the most memorable dinner pies you
can create. We begin with steamed mussels, in part for the meats but also for
the lovely broth. Next we’ll simmer shrimp in that broth, thicken the liquid
with a buttery roux, and build flavor with aromatic vegetables and Old Bay.
Lastly, we’ll bulk up the filling with peas and potatoes, add a flaky pastry, and
bake to perfection. This is a dish to make when you’re not feeling pressed.
Take your time, and settle in for a few hours of delightful puttering.
MAKES 4 TO 6 SERVINGS
1 recipe **Go-To Pie Dough, divided as instructed in step 1 and refrigerated
FILLING
2 pounds mussels, scrubbed and debearded (see [>])
½ cup dry white wine
About 2 cups bottled clam juice
8 ounces large shrimp, peeled and deveined
4 tablespoons (½ stick) unsalted butter
1 medium onion, finely chopped
1 celery rib, chopped
8 ounces white mushroom caps, sliced
2 or 3 garlic cloves, minced
⅓ cup all-purpose flour
2¼ teaspoons Old Bay Seasoning
⅓ cup half-and-half
1 cup peeled and finely diced red-skinned potato
1 cup frozen green peas (no need to thaw)
¼ to ½ cup canned or fresh diced tomatoes
1 egg beaten with 1 tablespoon milk
1. Prepare the dough as instructed, dividing it into four to six equal pieces,
depending on the size of the individual pot pie dishes you’ll be using
(they should each have a capacity of 1 to 1¼ cups). The pastry will be
used for the top crust—there is no bottom crust—so unless your dishes
are more than, say, 5 inches wide, you can probably get six out of a
single batch of dough. Wrap each piece of dough in plastic wrap and
refrigerate for at least 1½ hours. While the dough chills, butter your pot
pie dishes and set them aside.
2. Put the mussels in a large pot and add the wine. Cover and bring to a boil
over medium-high heat, then steam the mussels for 5 to 7 minutes. Using
a slotted spoon, transfer the mussels to a large bowl and set aside to cool,
reserving their cooking broth. Discard any that haven’t opened.
3. Line a colander with cheesecloth and place it inside another bowl. Pour
the mussel broth through it to strain out any particles, then pour the
strained liquid into a 2-cup measuring cup. Set aside. When the mussels
are cool enough to handle, pick the meats from the shells (discard the
shells) and set aside.
4. Rinse the original pot and put it back on the stove. Add enough clam
juice to the mussel broth to make 2 cups. Pour these 2 cups into the pot,
then add another ½ cup clam juice. Bring to a simmer over medium heat
and add the shrimp. Cover and poach just until the shrimp are opaque
and cooked through, 2 to 3 minutes. Pour the broth and shrimp into a
bowl and set aside. Put the pot back on the stove over medium heat.
5. Melt the butter in the pot, then stir in the onion, celery, and mushrooms.
Cook the vegetables until the onions are translucent, 5 to 6 minutes, then
stir in the garlic, flour, and Old Bay. Cook, stirring, for 1 minute, then
add the shrimp and broth. Cook for several minutes, stirring, until the
sauce thickens. Add the half-and-half and simmer gently for a minute or
two. Remove from the heat. Preheat the oven to 375°F.
6. Put the potatoes and peas in a small saucepan. Add enough lightly salted
water to barely cover. Bring to a boil over medium-high heat, then
reduce the heat and cook at a low boil until the potatoes are just tender, 7
or 8 minutes. Drain.
7. Taste the creamy fish sauce; add salt and pepper to taste. Add the
mussels, potatoes, peas, and tomatoes. Divide the filling evenly among
the buttered dishes.
8. Working with one piece of dough at a time (and leaving the others in the
refrigerator), roll the pastry so it is slightly larger than the diameter of the
dish. Place the pastry over the filling, tucking it down between the filling
and dish. (You can also roll the pastry even a little bigger, and drape it
over the sides of the dish.) Poke a steam vent in the top with a paring
knife. Repeat for the other pot pies.
9. Place the dishes on a large baking sheet. Lightly brush the pastry with
the egg wash. Bake the pies on the center oven rack until the filling is
bubbly and the tops are golden brown, about 40 minutes. Transfer the
dishes to a rack and cool for at least 10 minutes before serving.
RECIPE FOR SUCCESS
The filling can be made earlier in the day and divided up, then
refrigerated, and the pastry can be made a day or two ahead. However,
the pot pies should be assembled and baked the same day.
If you prefer clams over mussels, those will work fine in this recipe, too.
MUSSELS KNOW-HOW
Whenever possible, I like to prepare mussels the same day I buy them,
because freshness is everything when it comes to seafood. To ready
mussels for cooking, first scrub them under running water with a firm
brush to remove loose grit. If any of the mussels are partially open, tap
with a finger: They should close up. If not, discard, along with any
others with damaged or partially missing shells. Use scissors to cut off
any hairy little beards that are attached. After they’ve steamed, discard
any mussels that haven’t opened.
***********************************************************************************

Shrimp Pot Pie
These pot pies are rich and creamy, with little to distract from their right-off
the-trawler taste of fresh shrimp. The portions may be small, but the flavor
payoff is huge—the perfect dish to celebrate a seaside getaway, even if it’s
just the one in your dreams.
MAKES 4 TO 6 SERVINGS
1 recipe Go-To Pie Dough , divided as instructed in step 1 and refrigerated
FILLING
3 tablespoons unsalted butter
8 ounces large shrimp, peeled and deveined
1 leek (white and pale green parts only), finely chopped, or 1 small onion, finely
chopped
3 garlic cloves
1 celery rib, finely chopped
1 medium carrot, peeled and finely diced
8 ounces thinly sliced white mushroom caps
1 tablespoon all-purpose flour
½ teaspoon smoked paprika
1½ cups half-and-half
½ cup heavy cream
¼ teaspoon dried thyme
1 egg yolk beaten with 1 tablespoon milk
1. Prepare the dough as instructed, dividing it into four to six equal pieces,
depending on the size of the individual pot pie dishes you’ll be using
(they should each have a capacity of 1 to 1¼ cups). The pastry will be
used for the top crust—there is no bottom crust—so unless your dishes
are more than, say, 5 inches wide, you can probably get six out of a
single batch of dough. Wrap each piece of dough in plastic wrap and
refrigerate for at least 1½ hours. While the dough chills, butter your pot
pie dishes and set them aside.
2. Melt the butter in a large stovetop casserole over medium heat. Add the
shrimp and cook for 1 minute on each side. Transfer the shrimp to a plate
to cool—it won’t be fully cooked yet. When cool, cut each shrimp into
two or three bite-size pieces.
3. Add the leek, garlic, celery, carrot, and mushrooms to the pan. Salt and
pepper lightly. Cover the pan and sweat the vegetables for about 5
minutes, stirring occasionally. Stir in the flour and smoked paprika. Cook
for 1 minute, stirring, then add the half-and-half. Bring to a gentle
simmer and, as the filling starts to thicken, stir in the heavy cream,
thyme, ¼ teaspoon salt, and the shrimp. Simmer gently for several more
minutes, then taste again and add more salt and pepper as needed.
Remove the pan from the heat, divide the filling evenly among the
buttered pans, and cool (see Recipe for Success).
4. When you’re ready to bake the pies, preheat the oven to 375°F. Put a
large baking sheet on the center oven rack to preheat along with the
oven.
5. Working with one piece of dough at a time (and leaving the others in the
refrigerator), roll it out about 1 inch larger than the diameter of your pie
dish. Drape the dough over the filling and pan, letting it hang down the
sides. Using a paring knife, make a small steam vent in the pastry.
Repeat for the rest of the pies. Lightly brush the pastry with the egg
wash.
6. Place the pies on the baking sheet in the oven and bake until the top crust
is golden brown, about 35 minutes. Don’t overbake; you don’t want all
the flavorful sauce to dry up. Transfer the pies to a cooling rack and cool
for about 10 minutes before serving.
RECIPE FOR SUCCESS
This is another one of those cases where I like to get the filling as cool as
I can before baking. If the filling is still hot or even warm when these
begin to bake, it will bubble and boil and lose much of its sauciness
before the pastry is fully baked. The best tactic is this: After the filling
comes off the heat, immediately ladle it into your individual pie pans.
Cool to lukewarm, then put them in the fridge for about an hour (or
more; this is a great do-ahead step if you want to do most of the work in
advance). Finally, roll the pastry, drape it over the top, and bake.
******************************************************************************

Chicken Pot Pie with Winter Vegetables
Brussels sprouts may be the most underrated vegetable going, and if you
agree then you’re probably going to love this version of chicken pot pie.
Another twist: Instead of the usual carrots, I use chunks of winter squash. The
squash cooks up softer than carrots do, but I think it has all the sweetness and
at least as much flavor, so it’s a good trade. Mashing the potato and adding it
back to the filling makes for a nice thick sauce, delicately flavored with a
touch of mustard and thyme. A perfect dinner pie for those coldest of winter
days.
MAKES 6 SERVINGS
1 recipe Go-To Pie Dough, refrigerated
FILLING
4 cups chicken broth
1½ cups peeled and diced baking potato
1½ cups quartered Brussels sprouts
1 cup peeled and diced winter squash
3 tablespoons unsalted butter
1 large onion, chopped3 tablespoons all-purpose flour
3 cups chopped cooked chicken
2 teaspoons Dijon mustard
1 teaspoon dried thyme
1 egg beaten with 1 tablespoon milk
1. If you haven’t already, prepare the pastry and refrigerate for at least 1½
hours.
2. Bring the chicken broth to a simmer in a large saucepan over medium
high heat. Add the potato and bring to a low boil. Reduce the heat and
simmer, partially covered, until the potato is tender, about 10 minutes.
Using a slotted spoon, transfer the potato to a mixing bowl. Add a few
tablespoons of the broth and mash with a large fork or masher. Set aside.
3. Bring the liquid back to a very low boil and add the Brussels sprouts.
Simmer for 1½ minutes. Add the squash and cook for 2 minutes more.
Using a slotted spoon, transfer the vegetables to the bowl with the
mashed potatoes. (Note: The vegetables won’t be tender, just
parcooked.) Reserve the broth.
4. Melt the butter in a large, heavy stovetop casserole over medium heat.
Add the onion and sauté until soft and translucent, about 8 minutes. Add
the flour and cook, stirring, for 1 minute. Stir in 2½ cups of the reserved
broth, about half at a time, adding the second portion once the first one
thickens up. Stir in the chicken, mustard, thyme, ½ teaspoon salt, and
ground black pepper to taste. Stir in all of the reserved vegetables.
5. Simmer the filling for several minutes, adding more broth, if desired, to
make the vegetables as saucy as you like. (The sauce shouldn’t be too
thick because the starch in the potato will continue to thicken it as the pie
bakes.) Taste and correct the seasoning. Transfer the filling to an oiled
medium-large baking dish. Ideally, the filling should be about 1 inch
from the top rim of the casserole. Set aside to cool for 30 minutes while
you preheat the oven to 375°F.
6. On a floured work surface, roll the dough out so it is the same shape as
your casserole, but just a tad larger. Drape the pastry over the filling,
tucking it down between the filling and the dish. Using a paring knife,
poke two or three steam vents in the pastry. Lightly brush the pastry with
the egg wash. Bake on the center oven rack until the filling is bubbly and
the pastry is golden brown, 35 to 40 minutes. Transfer to a rack and cool
for at least 15 minutes before serving.
RECIPE FOR SUCCESS
One of the tricks to a well-baked pot pie is choosing a casserole that
accommodates the filling without being over- or underfilled. If there’s
too little filling for the pan, the pastry will sit too low and not brown up
nicely. If it sits too high in the pan, you run the risk of the filling
bubbling over. The best solution is to have a variety of sizes at your
disposal. Don’t be surprised if—after you’ve added the filling to the
casserole—you decide you actually need a larger (or smaller) one.
Happens to me all the time.
WHITE MEAT OR DARK?
Every ad I see for chicken pot pie makes a big deal of the fact that their
pie uses only white meat chicken. What’s up with that? White meat—
breast meat—chicken is great and all, but personally I think the dark
meat is more tender and has a better chicken flavor. So I use both in my
pot pies. Yes, it’s true that dark meat has more fat and calories than
white, but the difference is negligible and certainly not enough to worry
about unless you’re eating legs, wings, and thighs by the bucketful.
****
**Go-To Pie Dough
It’s no mystery why I call this my “go-to” dough: It’s so versatile that I use it
for perhaps four out of every five of the savory (and sweet) pies that I make.
You can’t beat it for reliability, and it bakes up to a beautiful texture, perfectly
balanced between flaky and short. This is the single crust recipe; the double
crust version follows. The recipe calls for a food processor; to make the
dough by hand, see the Note.
MAKES ENOUGH FOR 1 (9½-INCH) PIE OR TART SHELL
8 tablespoons (1 stick) cold unsalted butter plus 2 tablespoons cold
vegetable shortening (or 10 tablespoons cold unsalted butter), cut into ½-inch cubes
1½ cups all-purpose flour
1½ teaspoons cornstarch
½ teaspoon salt
2 teaspoons white vinegar
Scant ⅓ cup cold water
1. Put the butter and shortening cubes in a single layer on a flour-dusted
plate, with the shortening off to one side of the plate by itself.
Refrigerate for at least 30 minutes. Combine the flour, cornstarch, and
salt in a bowl and refrigerate that mixture also. Pour the vinegar into a 1-
cup glass measure. Add enough cold water to equal ⅓ cup liquid.
Refrigerate.
2. When you’re ready to mix the pastry, transfer the flour mixture to a food
processor. Pulse several times to mix. Remove the lid and scatter about 6
tablespoons of the butter—a little more than half of the total fat—over
the dry mixture. Pulse the machine five times—that’s five 1-second
pulses—followed by an uninterrupted 5-second run. Remove the lid and
add the remaining fat. Give the machine six or seven 1-second pulses.
3. Remove the lid and loosen the mixture with a big fork; you’ll have a
range of fat clods, most quite small but a few larger ones as well. With
the lid off, drizzle about half of the liquid over the mixture. Replace the
lid and give the machine three very quick, half-second pulses. Remove
the lid, loosen the mixture with your fork, and add the rest of the liquid.
Pulse briefly three or four times, just like before. The mixture will still
look crumbly, but the crumbs will be starting to get a little clumpier.
4. Transfer the contents of your processor to a large bowl, one large
enough to get your hands in. Start rubbing the crumbs together, as if you
were making a streusel topping—what you’re doing is redistributing the
butter and moisture without overworking the dough. (Note: If your
dough mixture came out of the food processor more clumpy than crumblike,
don’t worry. Just pack it together like a snowball, knead it very
gently two or three times, and proceed to step 5.) You can accomplish
the same thing by “smearing” the crumbs down the sides of the bowl
with your fingers. When the dough starts to gather in large clumps, pack
it like a snowball and knead gently, three or four times, on a lightly
floured surface.
5. Put the dough on a long piece of plastic wrap and flatten it into a 1-inch
thick disk. Wrap tightly in plastic wrap and refrigerate for at least 1½ to
2 hours; overnight is fine. (You can also slip the wrapped dough into a
gallon-size plastic freezer bag and freeze it for up to 2 months. Thaw
overnight in the refrigerator before using.)
NOTE: To make the dough by hand, chill all of your ingredients as
specified in step 1, but increase the flour to 1½ cups plus 1½
tablespoons.
Remove the butter and shortening from the refrigerator 5 to
8 minutes before mixing; it should have a little “give” to it when
squeezed between your fingers. Add about 6 tablespoons of the butter to
your dry mixture; toss to coat with flour Using your pastry blender, cut
in the butter until the largest pieces of fat are pea-size. Add the
remaining fat, toss to coat, and cut that in.
The entire mixture should look like it has been “touched” by the fat,
and nothing should be larger than pea-size. Pour half of your liquid
down around the sides of the bowl, but not in any one spot. Mix well
with a large fork, moving the mixture in from the sides and up from
the bottom. Repeat with the remaining liquid, but add the last few
teaspoons only if needed. Rub and smear the crumbs as specified in
step 4 until a dough starts to form. Pack the dough and knead gently
a couple of times. Flatten into a disk, then wrap and refrigerate.
RECIPE FOR SUCCESS
In case you’re wondering why there’s vinegar here and in some of the
other pastry recipes, it’s because vinegar is an acid, and acids tenderize
things made with wheat flour. That’s why sour cream pancakes and
buttermilk biscuits have that melt-in-your-mouth softness. Don’t worry:
You won’t taste the vinegar in the finished crust
****
All the above from "Dinner Pies"
https://www.goodreads.com/book/show/24611149-dinner-pies
Delicious crusts! (The Fillings are pretty good too!)


Ken Haedrich, is one of America’s leading baking authorities and a prolific
writer. The author of 17 cookbooks and hundreds of magazine articles.
His bestselling 2005 book - PIE - was named one of the top seven baking
books of the last 25 years by Cooking Light magazine.
Ken has received numerous accolades for his work and is the recipient of
The Julia Child Cookbook Award. He has spoken about food and food writing
at The Smithsonian; appeared on numerous radio and television shows,
including Good Morning America; and has been a regular contributor to such
magazines as Food & Wine, Bon Appetit, Real Simple, and Better Homes & Gardens.
Ken is the creator of the popular website, The Pie Academy (ThePieAcademy.com)
where he shares his passion for pies and expertise with thousands of subscribers.
Each fall, he and his wife Bev host in-person Pie Getaways in Charleston, South
Carolina or - more recently - Woodstock, Vermont where members converge from
all parts of the country to hone their pie making skills under Ken’s tutelage.
https://the-pie-academy.mykajabi.com/blog/lets-begin-here
 = new reply since forum marked as read
Highlight:
NoneDon't highlight anything
5 newestHighlight 5 most recent replies
= new reply since forum marked as read
Highlight:
NoneDon't highlight anything
5 newestHighlight 5 most recent replies

elleng
(141,645 posts)
justaprogressive
(5,957 posts)The "Dinner Pies' book is all savoury...Will this do??
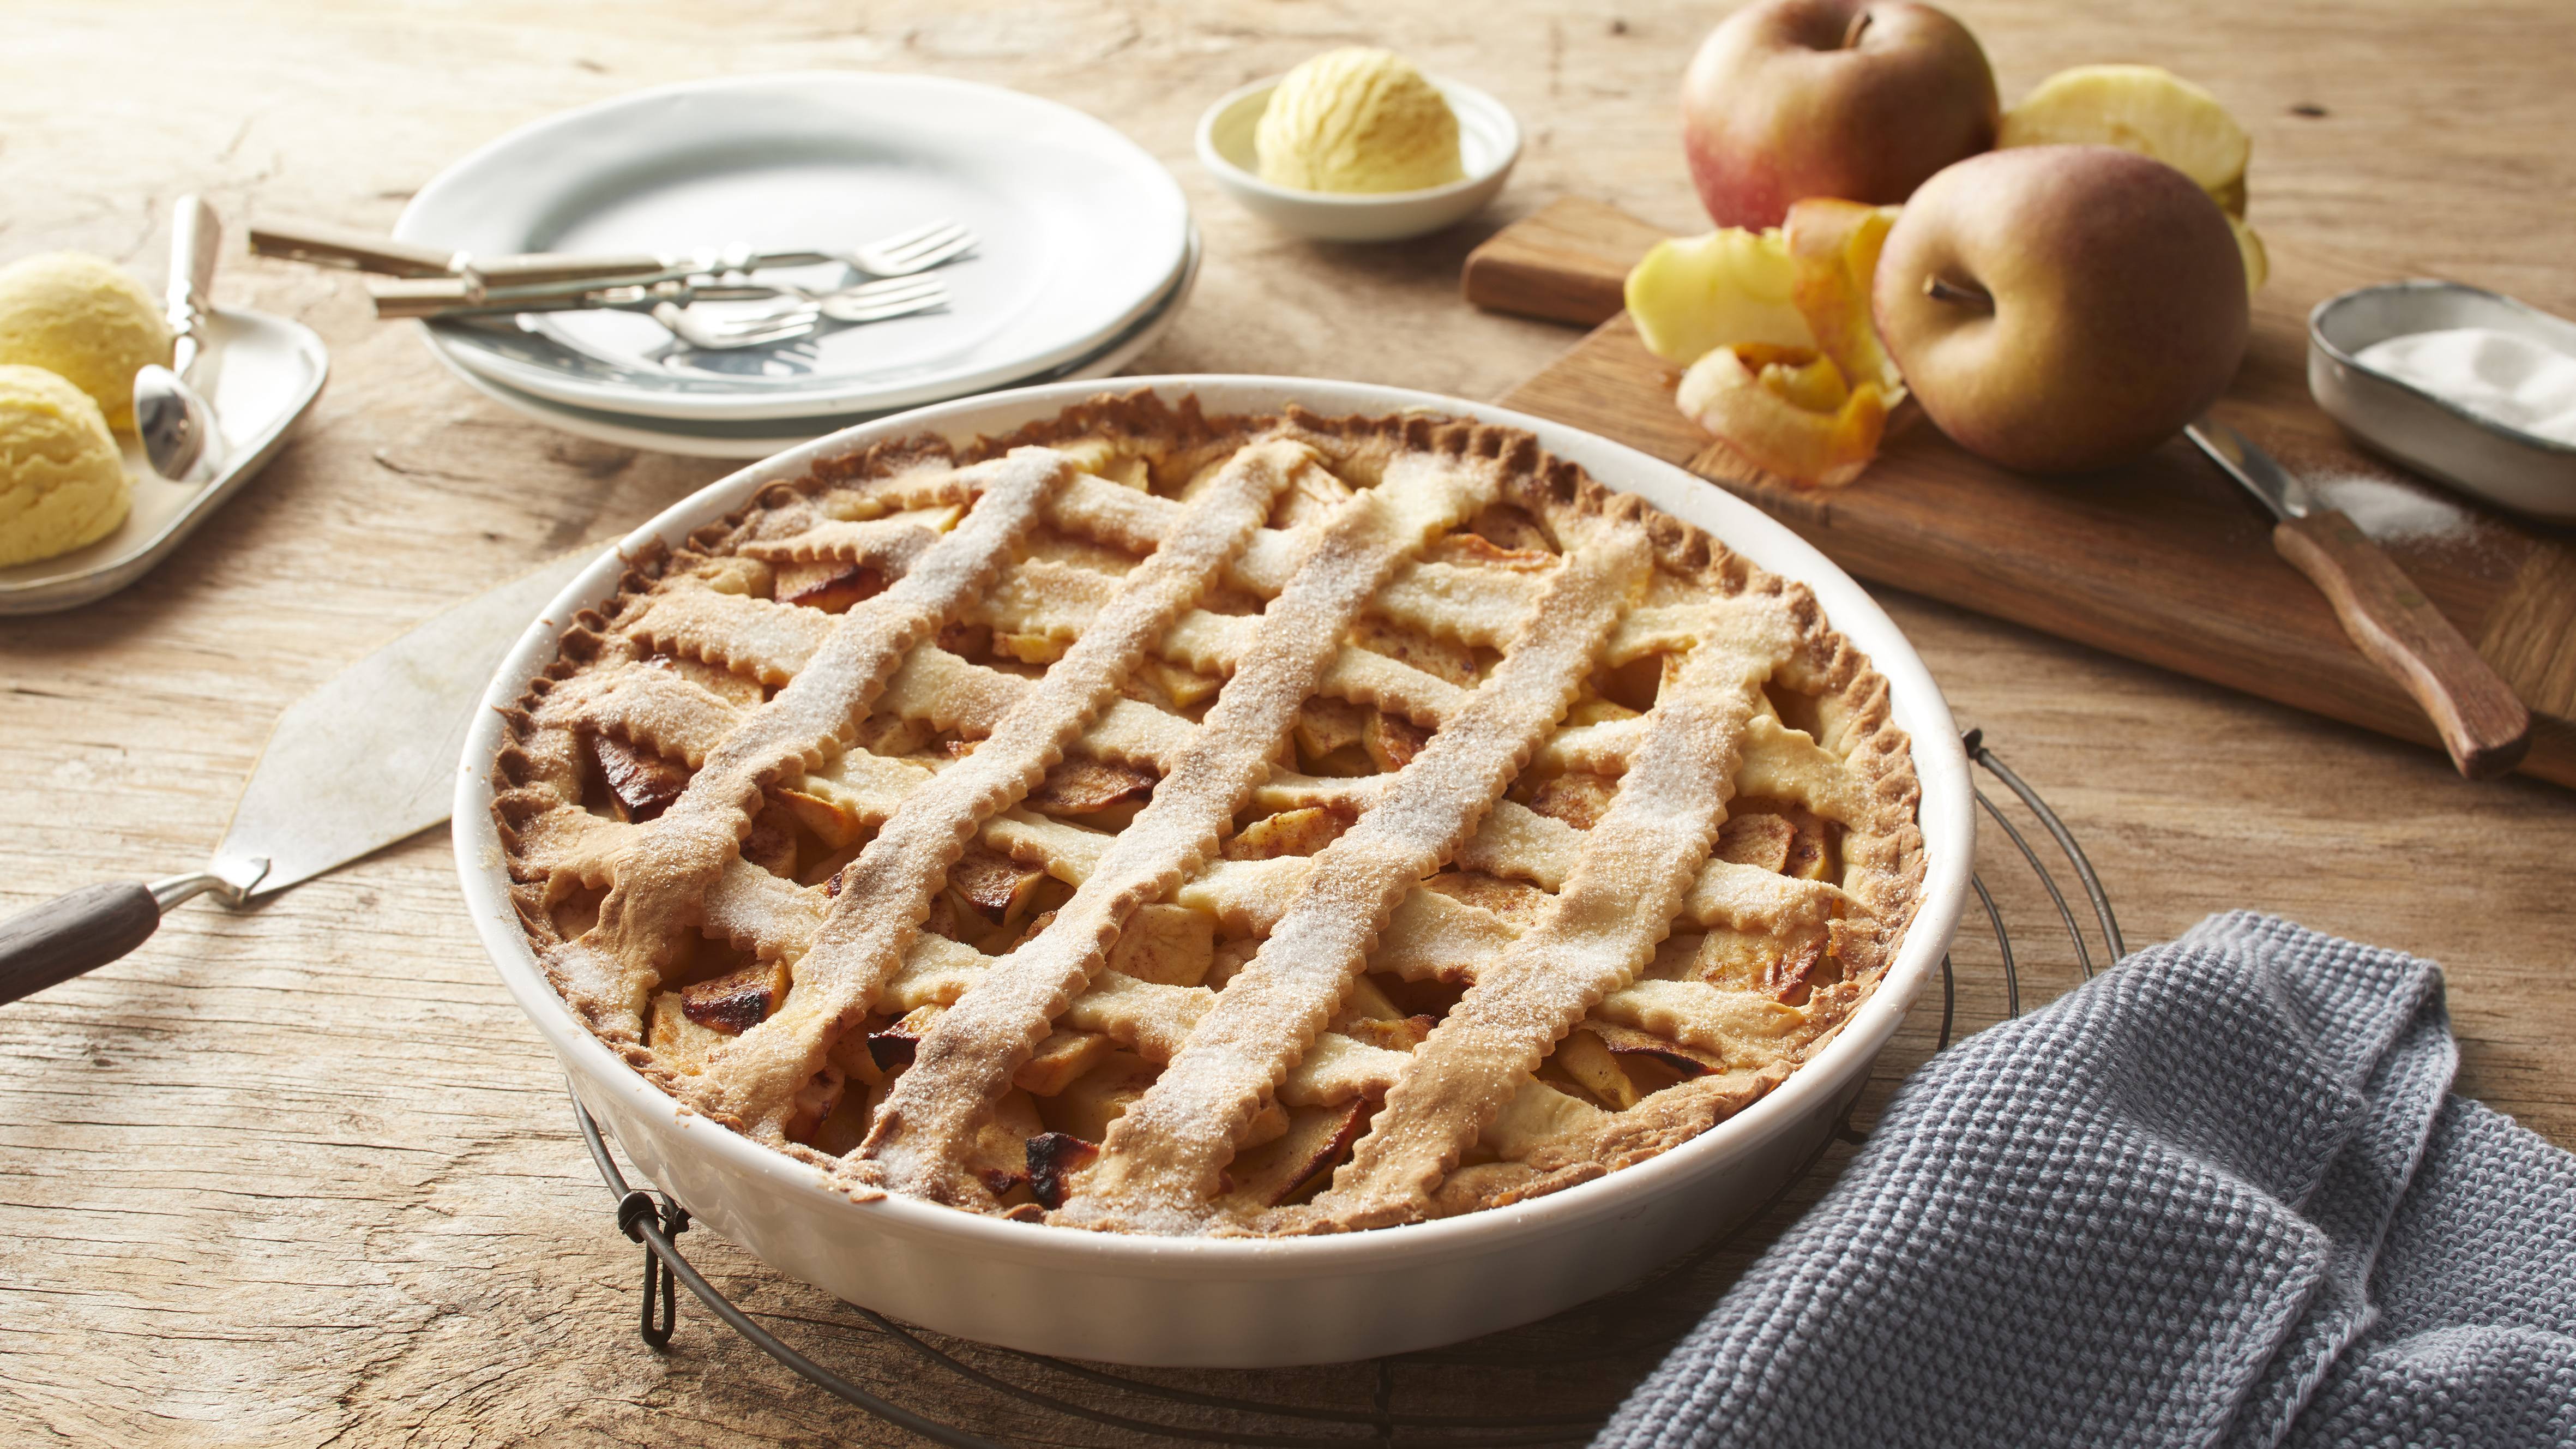
Gedeckter Apfelkuchen "Lattice"
Ingredients
300 g flour
5 tbsp sugar
1 pinch of salt
3 drops of vanilla flavor
80 g Sanella in the winder
100 g natural yogurt
2 tbsp cold water
750 g of sour apples (e.g. Boskop or Jonagold)
1 Msp. (large pinch) Clove Powder
1 pinch of cinnamon
Sanella and flour for the baking dish
A little sugar to sprinkle
Preparation
Take 300 g (10.5 oz) flour, 3 tablespoons of sugar, 1 pinch of salt,
3 drops of vanilla flavor, 80 g (3 oz)of sanella, 100 g (3.5 oz) of
natural yogurt and 2 tablespoons of cold water quickly knead to a
dough. Wrap in cling film and place in the fridge for 30 minutes.
Preheat the oven to 200 °C top/bottom heat (hot air 180 °C). (400°F)
Peel, deseed, quarter and cut into 1 cm thick wedges for 750 g
(1 lb 10.5 oz) of sour apples.
Roll out about 2/3 of the dough round (slightly larger than the baking pan)
on a floured work surface. Place in a baking dish (26 cm Ø) greased with
Sanella and sprinkled with flour and slightly press on the edge about 2 cm high.
Spread the apple wedges evenly on the bottom of the dough. Add 2 Tbsp Sugar,
and a large pinch of cloves. Mix the clove powder and 1 tsp cinnamon and spread
evenly over it.
Roll out the rest of the dough and cut into 2 cm wide strips. Place the strips in
the shape of a diamond on the apple wedges and thus form a lattice. Press
tightly on the sides and sprinkle with sugar. Bake the ready-met apple pie on
the bottom rail of the oven until golden brown for 45 minutes.
The Apple Pie tastes particularly good when it is served hot from the oven
with a portion of vanilla ice cream.
https://www.sanella.de/rezept/gedeckter-apfelkuchen-lattice-254181